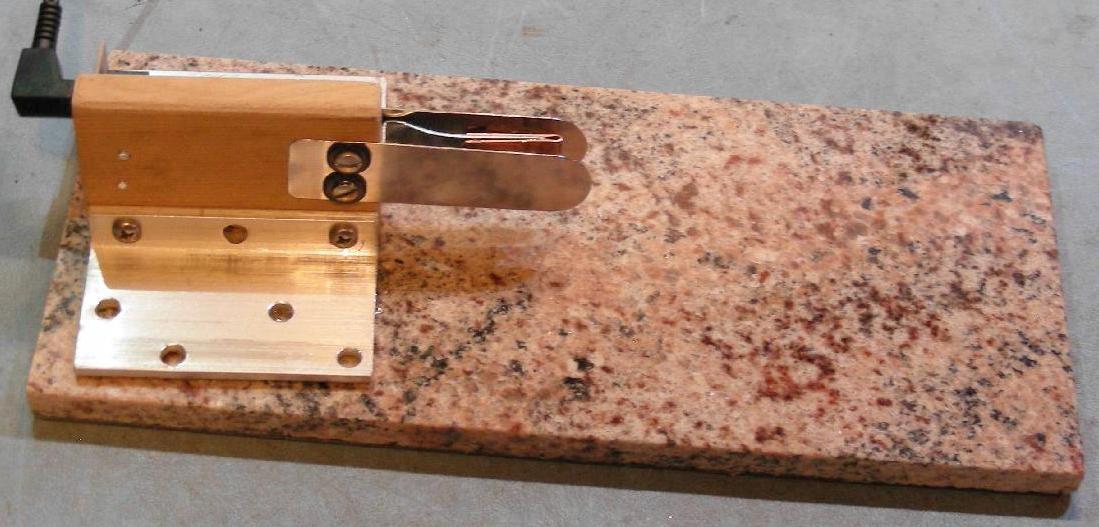
This project involves the construction of a two terminal Morse code keying paddle that can be used with electronic keying devices. The paddle elements were made from metal that was cut out of an old kitchen spatula which was broken after years of use in the kitchen. I use the paddle with my ancient but still excellent WB4VVF accu-keyer board, it can also be used with the built-in keyers found in most modern radio transceivers. See my Accu-Keyer Extended project for an updated version of the keyer. Electrically, the paddle is just two independent flexible SPST switches and it can support iambic keying (alternating dots and dashes) when both paddles are pressed.
This is a first-generation prototype, it was made with parts that were on-hand and is held together with glue. Despite that, the paddle is very easy to use and works as well as or better than other paddles that I have tried. The paddle's contacts are fairly close together and there's virtually no mechanical hysteresis so it is very good for fast sending.
The total cost for the project was just a few dollars, I paid $0.50 for the 3-pole 3.5mm jack, $0.50 for the marble scrap and small change for the brackets and hardware.
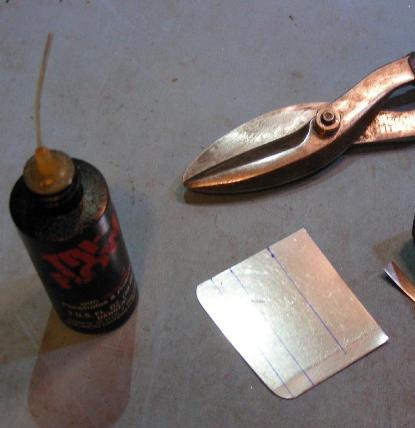
The above photo shows the original stainless steel spatula remnant that was used for making the moving parts. The thumb and index finger pieces were cut out using tin snips and oil, then trimmed round on both ends to make a pair of identical D-shaped pieces. After cutting, the two pieces had a small twist, that was eliminated by carefully bending the pieces using a vise and some pliers.
The two pieces were carefully filed around all of the edges to make the rounded sides even and to smooth out all of the sharp edges. The mounting holes were punched and drilled out on a drill-press. Stainless steel is a very hard material, so the holes were started with a 1/16" drill, then elarged with a 3/32" drill and finalized with a 1/8" drill, which allows them to be mounted with 4-40 machine screws.
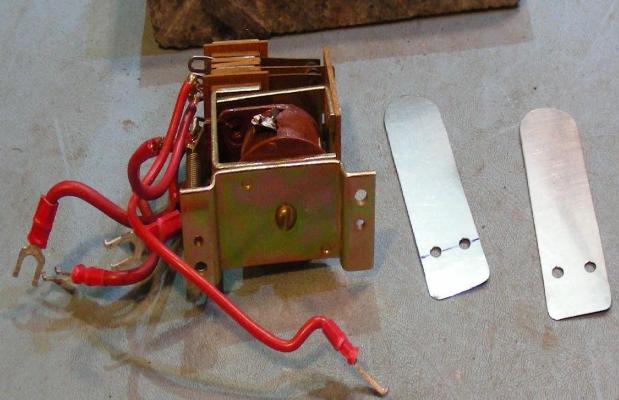
An old relay was parted out, its contacts were used on the two stanless steel pieces. The contacts were mounted on bakelite spacers and attached to the inside of the paddles using hot-melt glue. This could be an eventual point of failure, but there is very little bending in this part of the paddle and the contacts have held up well so far.
A piece of 3/8" thick pine wood was cut to 1-3/4" tall and 2-1/2" long, then filed smooth, it acts as the center insulator. Two 1/8" holes were drilled through the wood to accomodate the 4-40 machine screw bracket mounting hardware. Two more 1/8" holes were drilled through the wood for the stainless steel paddle mounting hardware. The height of the paddle holes was set by holding the paddles in the operating position and marking the postition where they felt most natural.
The center pole was made with a piece of soft steel that was scrounged from an old PC card edge filler plug. The center piece was bent into the shape of a number 7, then mounted to the wood using a pan-head wood screw. The wood should be pre-drilled here so that it does not crack. A thin sheet of copper was wrapped around the steel center piece, flattened in a vise, then glued to the steel using hot-melt glue. The copper piece is used as the center contact.
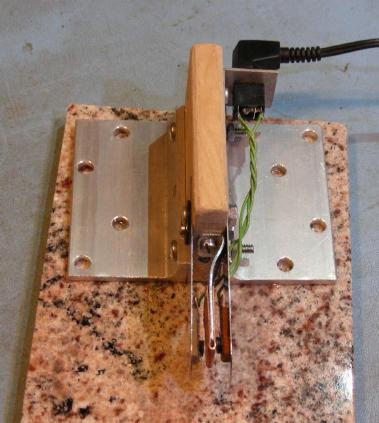
The two aluminum mounting brackets are made from heavy-gauge aluminum. The brackets came with numerous holes pre-drilled. The brackets were attached to the wood center piece and glued to the polished marble base with silicone caulk. The brackets were mounted with a slight offset angle, this allows my hand to rest in the center of the marble when sending. Left-handed operators should reverse the angle.
The marble base plate was made from 3/8" stock and was cut to 4" x 9" using a tile saw. The operator's hand should rest on the smooth side of the tile. A piece of 1/8" thick padded linoleum flooring material was cut to fit the bottom of the marble, then glued to the bottom of the marble with silicone caulk. The finished side of the linoleum rests on the operating desk. The linoleum prevents the paddle from moving around during use.
A 3.5mm stereo headphone jack was mounted to the back of the wood piece on a small L-shaped piece of aluminum using 4-40 machine screws. The center pole piece and stainless steel parts were all connected to ground in order to reduce the chance of static electricity getting into the keyer electronics. The grounded parts were wired to the 3.5mm jack sleeve. The small relay contacts were connected to the 3.5mm jack tip and ring elements using small-gauge flexible wires.
The contact spacing is mainly set by the thickness of the wood piece and the contact elements. The centering of the contacts can be adjusted by bending the center piece left and right. The center spacing may need to be asymmetrical to compensate for differences in muscle strength between your thumb and index finger. The contact spacing can be adjusted by changing the tension on the two mounting screws for the stainless steel pieces. Thin shims can be added between the wood piece and the stainless steel pieces if a wider spacing is desired. The optimal spacing is quite close, between 1/16" and 1/32". It may take some trial and error to get the paddle spacing set right, keep trying until you achieve the best keying "feel".
Your author has been very happy with this project, I have used it as my main CW paddle since it was built. My code speed and accuracy has improved with this paddle and it has a natural feel.
Back to FC's Ham Radio Circuits page.