(C) 2013, G. Forrest Cook W0RIO (formerly WB0RIO)
This project was purely experimental. The goal was to generate a parallel sequence of audio tones that would show up as characters in a waterfall display, also known as a spectrogram. Waterfall displays are commonly used by ham radio operators to visualize the audio that is received by a radio receiver. They can help to visualize digitally encoded signals such as CW, RTTY, psk31 and Olivia, to name a few.
Normally, the digitized audio data is fed into a decoder program. The tones generated with Tonewriter can be directly read as characters in the waterfall display. The concept is not unique, ham radio operators sometimes encode a few waterfall-readable characters in the preamble of a digitally encoded message. Tonewriter just puts that functionality on an Arduino board. The idea could be further expanded by sending higher resolution fonts, pixelated images and even greyscale images.
Several varients of the Hellschreiber mode work this way. This system is essentially the same as Concurrent Multi-Tone Hellschreiber (C/MT Hell). See this article on multi-tone Hellscrhreiber for more background info.
The functioning Tonewriter experiment can be seen in a short YouTube video.
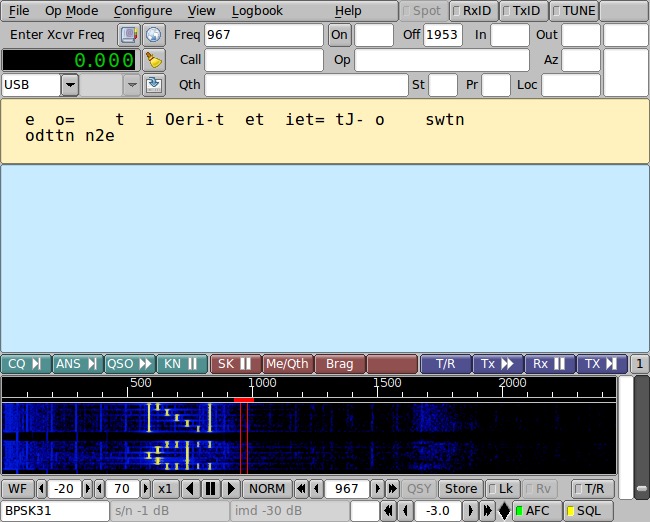
Two of the more common software applications that use waterfall displays are the open-source Fldigi (shown above) and the commercial Ham Radio Deluxe (HRD). The project was done on an older laptop running Ubuntu 10.10, so Fldigi was the appropriate software to use.
This project is far from practical, it is simply a proof of concept done in the Steampunk style. Steampunking involves mixing technologies from greatly different eras. This effort could be described as an incredible kludge. Credit should go to Terry Gilliam for his excellent movie Brazil, which features many such designs and some nice ductwork.
The project required writing several pieces of custom software and putting together some prototype hardware. Open-source tools were used and a common Arduino Uno processor was chosen as the main processor.
The first software challenge was to assemble a 5x7 character font into a format that could be used by an Arduino program. Datasheets for the ancient 2513 upper and lowercase character generator ROMs were studied. The characters maps were meticulously turned into groups of 5 hexadecimal numbers for each character. A quick Python program called fontprint.py2 (Python 2 version) or fontprint.py3 (Python 3 version) was written to help visualize the characters on a computer screen. A few of the 2513 characters were modified to make minor improvements.
The font data was transferred to the Arduino platform and incorporated into my Arduino sketch Tonewriter1.ino. Tonewriter1 just reads characters from the USB serial port and sends out a sequence of characters column by column. At this point, Tonewriter1 lacks the logic for controlling a transmitter's T/R line, but that should be fairly easy to add.
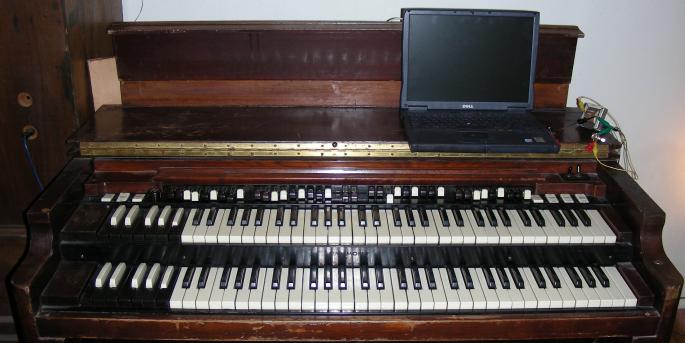
A source of audio sinewaves was needed to generate the tones used in this project. Your author happened to have a model B3 Hammond Organ handy. The organ's previous owner claims that it was used on the "Herman's Hermits" tour of the midwest and was also played by Booker T. Jones. the Hammond generates its tones with an intricate set of gears and iron cams (tonewheels) that drive a group of electromagnetic pickups. A group of around 90 sinewaves are continuously available from this device. Seven adjacent pickups with tones between 500 and 900 Hz were tapped into using alligator clips attached to the back of the tonewheel assembly.
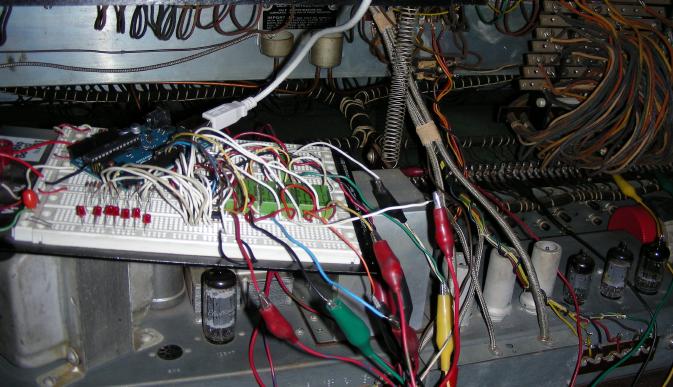
The electronics that interface the Arduino to the Hammond tone generator is quite basic, the 74HC595 tutorial was used as the basis for producing one latched byte of outupt data. Seven of the eight output bits from the 74HC595 are sent to a ULN2003 driver IC which in turn drives seven 12V SPST reed relays. One contact from each of the reed relays is connected to a single tone output from the Hammond tone generator. The other contacts from each reed relay are tied together to form the common audio signal.
The audio signal and the ground from the Hammond amp chassis are sent to the input of an external audio amplifier. The output of the audio amp was sent to a monitor speaker and also to the mic input of the laptop via an audio isolation transformer. Power to the Arduino (+5V) comes via the USB port. A 12V 3AH gell-cell was used for powering the ULN2003 and reed relays.
All of the custom electronics were built on a standard prototyping board, the connections to the Hammond and audio amp were all made with alligator clips. Finding seven adjacent notes on the tone generator was tricky. The wiring chart for the tone generator is available online, but it was easier to search for adjacent individual notes with an alligator clip fed to the amplifier's input. The project was built to be tempory, once the idea was proven to work everything was disassembled.
After everything was connected, the Fldigi software was run and the Arduino development environment's built-in serial terminal program was used for entering the text. Characters typed into the serial terminal produced groups of tones and the tones showed up on the waterfall display as characters. The device has never been tried "on the air".
Now that the basic concept has been proven, this idea could be used as the basis for a practical implementation that doesn't involve a huge antique organ and numerous aligator clips. One could generate the tones using solid-state oscillators, low pass filters and a summing amplifier. The signal could then be sent as audio to an SSB transmitter. With a simple Arduino controller, it would be fairly easy to build a device such as a textual beacon.
Another method to generate the tones would be to build seven crystal oscillators that are tuned to slightly different frequencies. Common 4, 5 or 8 Mhz crystals would probably be a good choice. Trimmer capacitors could be used to precisely adjust each oscillator's frequency. The oscillator outputs would need to be gated on and off by the Arduino, this could be done with LS-TTL or HC-TTL logic AND gates. The seven gated signals could then be sent through bandpass filters, resistively mixed together and buffered with an RF amplifier. The output could be mixed with a signal from a DDS VFO, filtered again then used to drive an RF amplifier. This method of generating the signals would eliminate the need for an SSB transmitter.
The tones could be spaced much closer together than the organ tones. Doing so would reduce the audio bandwidth and would also allow the throughput to be increased since the displayed width (bandwidth) and length (transmission speed) work together to make characters with a useful aspect ratio. The frequency spacing of the organ's musical notes are exponential, this causes the dot spacing in the letters to slightly stretch out to the right. A linear spacing would be a better choice for this application.
With some modification to the Arduino code, it would be possible to send out the signals as rows of 5 bits instead of columns of 7 bits. This would reduce the bandwidth and circuit complexity and make the characters display upright instead of sideways. The transmission speed would be slower and the sentences would display with the newest characters at the bottom.
Note that this type of encoding does not lend itself to being easily decoded into digital data, and the bandwidth usage is not very efficient. Thanks to the proliferation of ham radio receivers with built-in spectrum displays and the frequent use of software like FlDigi, this type of signal would be easy to monitor over the air and would probably be readable in the presence of moderate background noise.
Back to FC's Ham Radio Circuits page.