(C) 2023, G. Forrest Cook
The Sol-Man is a solar-powered solid-state electric guitar amp that features a small spring reverb tank and an 8" speaker. The amp produces up to 18 watts of audio output power, which is quite sufficient for a practice amp. The Sol-Man amp is ideal for taking along on camping trips, it could also be used for street performances. Two versions of the Sol-Man amp are shown here.
The Sol-Man is a tried-and-true design. The second build of the Sol-Man is still using it's original Gell-Cell battery which still holds a charge after more than ten years of use. The longevity of the battery is helped by the fact the amp sits in a location where it gets a few hours of sun each day.
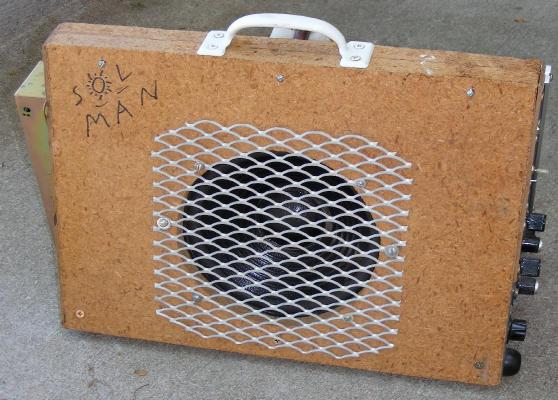
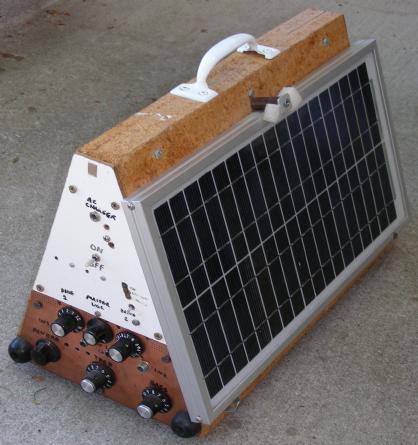
The first build of the Sol-Man is shown for historical purposes, It used a different charge controller circuit (the SPC3 board) and was built with two input channels and no clipping indicators. The solar panel was also larger and produced a higher charging current. Otherwise, the two versions of the amp were essentially the same. The triangulated box proved to be somewhat difficult to build and was a bit awkward to transport. The upward-angled speaker was handy for projecting the sound toward the player when the amp was used for practicing.
This is a fairly high-level project. It takes advanced technician skills to construct the amplifier circuitry. The 12V gell-cell lead acid battery can produce enough current to set wires and other components on fire if it is shorted out. Care should be taken to insure that the battery is fused and that none of the battery wiring can be short-circuited.
Guitar Input - High Impedance
Speaker Output - 4 ohms, 20W
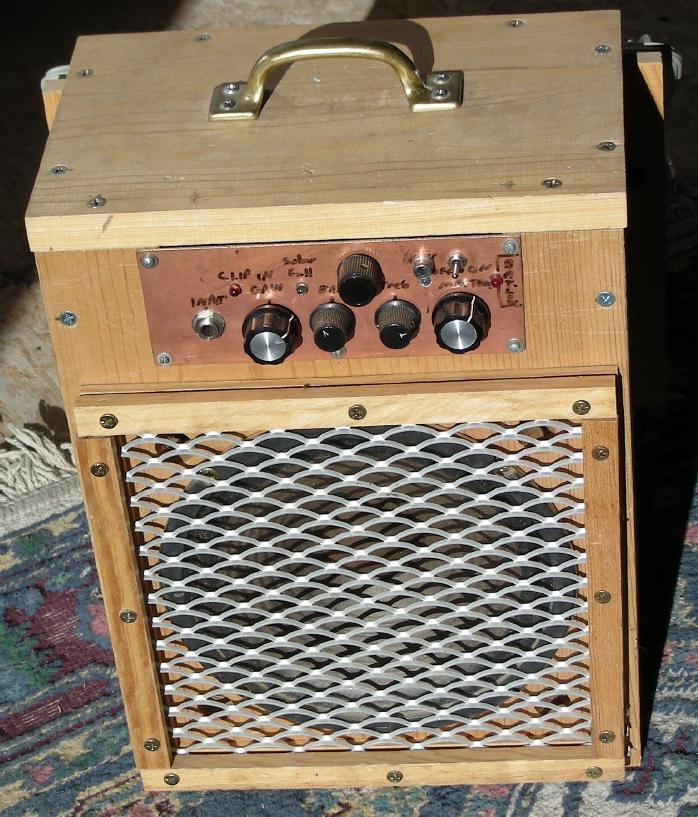
Power on/off switch
Power on LED
Solar full LED
Input Gain control
Clipping LED
Bass control
Treble control
Reverb Level control
Master Volume control
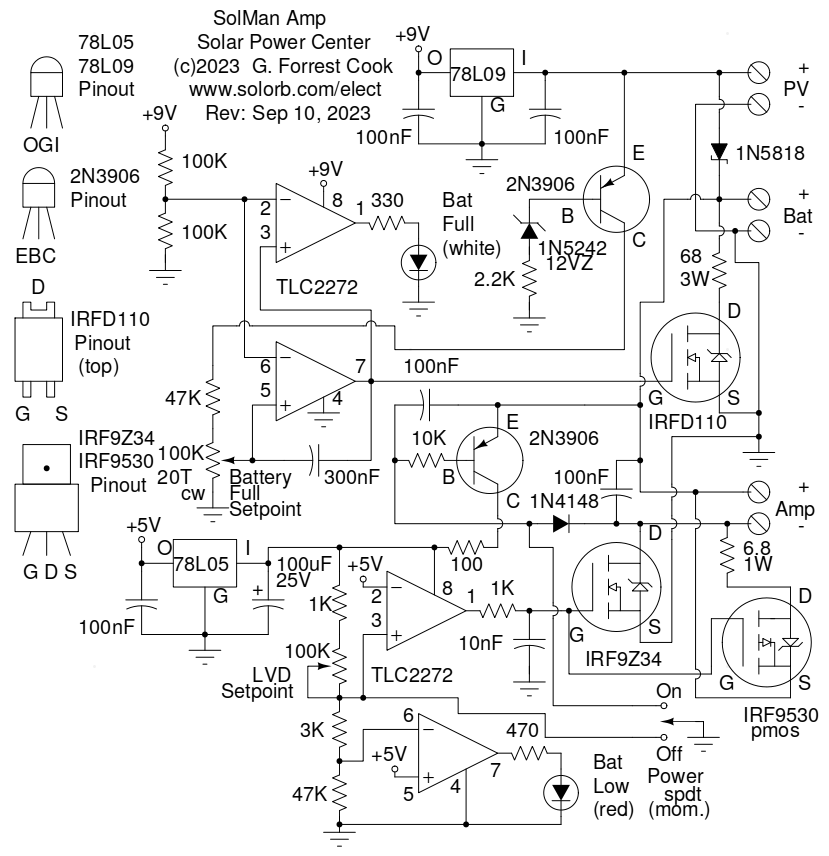
The Sol-Man amp is powered by a rechargeable gell-cell battery, it is a common 7 amp-hour type that is often used for alarm systems and emergency backup lighting. A higher amp-hour battery could be used for more capacity, but it would add a lot of weight to the amp. Solar power from the PV panel charges the battery via a Solar Power Center circuit.
A simpler charge controller circuit that can also be used with the Sol-Man is the Shunt-mode Solar Charge Controller, this is a subset of the Solar Power Center and does not include the load control circuitry, an external power switch would be required between the battery and the amp.
The charge controller section of the power center feeds solar power into the battery until a preset voltage is reached, then it dumps the excess solar power into a resistor. The power center also contains a power control switch, a low voltage indicator LED and an automatic low voltage disconnect.
The first build of the amp used a more complicated CirKits SPC3 solar power center to provide charge regulation and power management, however this kit is no longer in production.
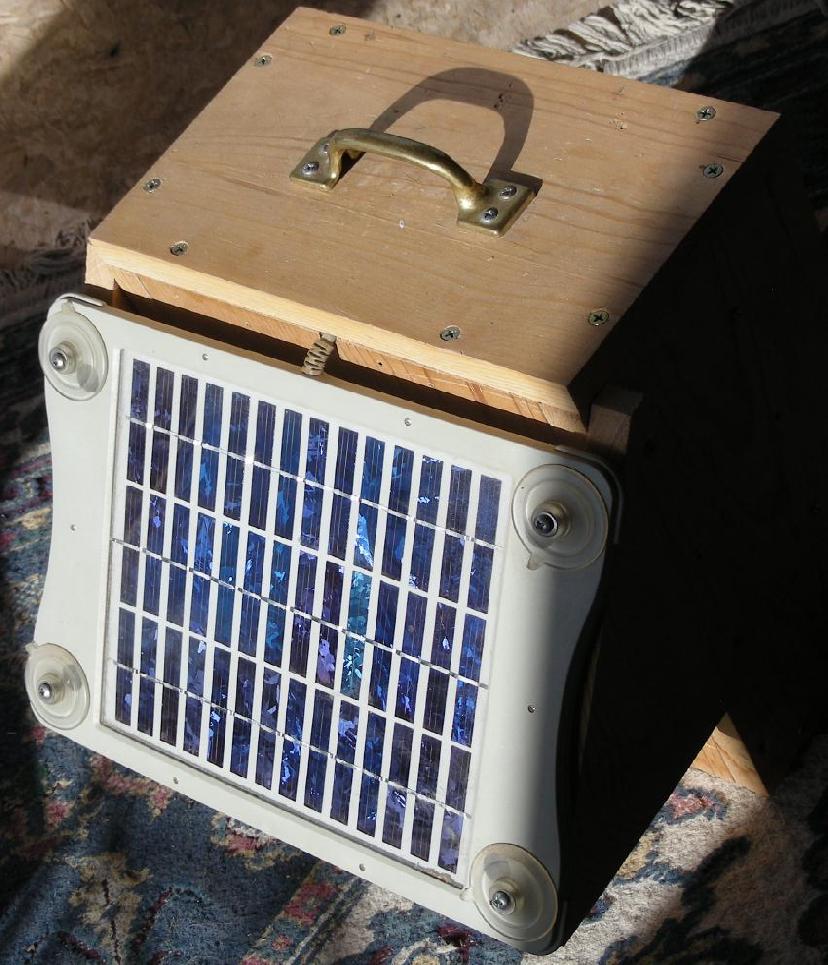
Solar power is provided by a Volkswagen 36-cell automotive solar panel on the second build of the amp. These panels were used by car dealers to keep the batteries charged while cars sat in the dealer lots. The panels were frequently available as surplus parts via eBay in the 1990s. Any 5 to 10 watt solar panel with a nominal 18V open-circuit voltage rating and a maximum 1 Amp short-circuit current rating can be used with the Sol-Man amp. The first build of the amp used a 10 watt solar panel.
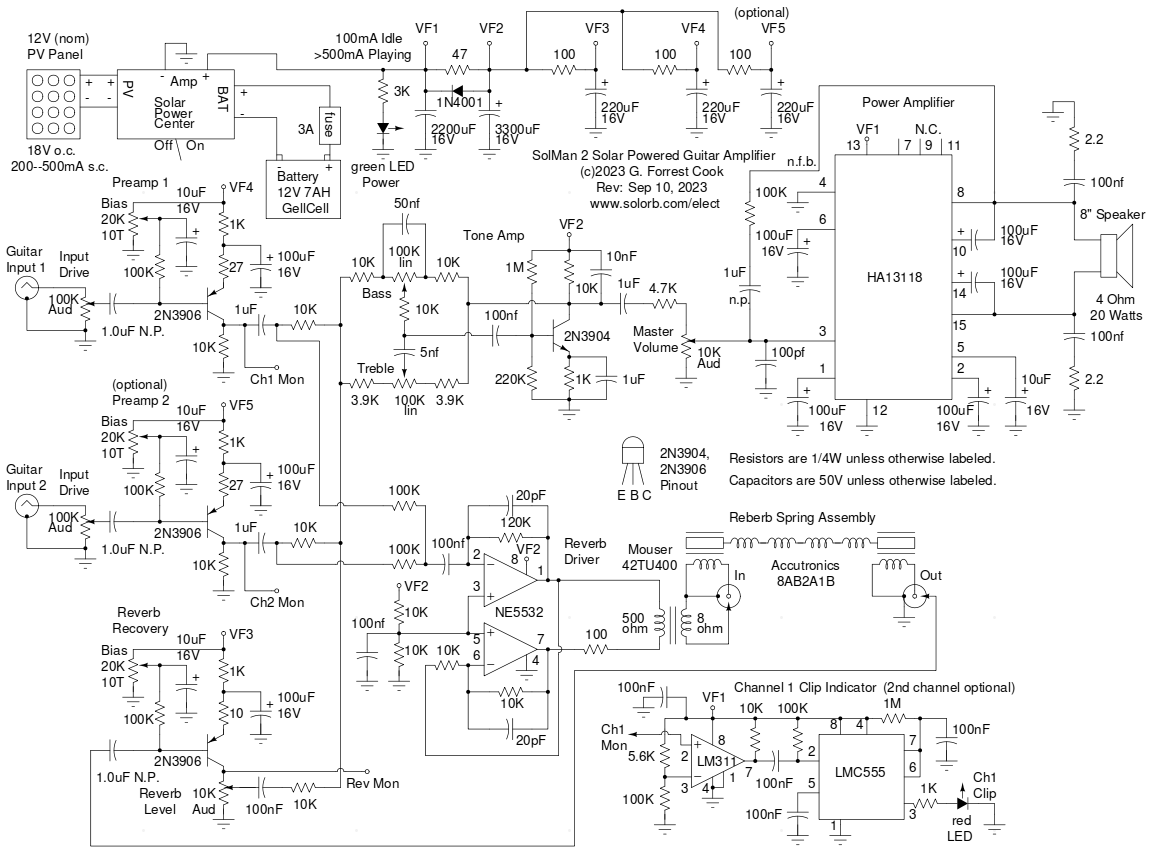
DC power to the various amp circuits is provided by a chain of resistors and capacitors which isolate the various stages from each other. The 1N4001 diode between VF1 and VF2 prevents an annoying oscillation from occurring when the amp is powered down.
The electric guitar preamp is provided by a 2N3906 PNP Class A amplifier stage which features an adjustable bias trimmer for setting the transistor's idle current to produce the least distortion. A PNP transistor was chosen because it can be less noisy than its NPN equivalent. An optional second guitar input is shown in the schematic, this was included in the first build of the amp but not the second.
An LED clipping indicator uses an LM311 comparator IC that feeds a CMOS 555 timer wired as a one-shot pulse stretcher. The clipping indicator is used in conjunction with the input drive control to adjust the preamp below the level where distortion occurs.
The preamp outputs are fed to a Baxandall tone stack with a 2N3904 recovery amplifier in a Class A configuration. The tone stack output goes through a 4.7K gain reduction resistor and into the master volume control pot which feeds the power amplifier.
The Sol-Man's audio power amplifier uses a Hitachi HA13118 (pdf) IC, which was purchased pre-assembled on a small circuit board with a built-in heat sink. The HA13118 is an 18 Watt mono amplifier with a bridged output circuit. The 100K/1uF negative feedback network was added to the HA13118 board to further reduce the IC's high gain. The power amp drives a 4 ohm 20W 8" general purpose replacement speaker.
The reverb drive signal is tapped off of the guitar preamp outputs via two 100K resistors and is fed to a NE5532 audio-grade op-amp that is wired in a bridged configuration to provide bi-polar drive for the reverb tank. The 100 ohm output resistor limits the reverb drive to prevent distortion.
In the first build of the amp, a 70V to 16 ohm speaker transformer was used to match the op-amp's output impedance to the reverb tank's input impedance. In the second build, a smaller and lighter Mouser 42TU400 500 ohm to 8 ohm transformer was used. Tanks with a higher input impedance could probably be driven directly by the NE5532, although this has not been tried.
The output of the reverb tanks is fed to another 2N3906 class-A amplifier stage, which boosts the reverb signal before it is mixed with the clean signal. The reverb signal can be adjusted by the Reverb Level control.
The Sol-Man was built into a rectangular wooden box made with 3/4" pine board. The speaker was mounted on the front of the box and a protective metal grille was assembled over the speaker with small wooden strips. Four 1" bass-reflex holes were drilled into the front of the box around the speaker. The battery was mounted on the bottom of the box and secured with plumbing strap and wood screws. The reverb unit was attached to the inside of the box with wood screws. A carrying handle was mounted on the top of the box.
Several different circuit boards were built for this amp using hand-wired point-to-point construction on perf boards and bare copper circuit boards. The boards include: the solar power center, the preamp and tone control circuits, the reverb send and return circuit, and the power amplifier circuit. The preamp and tone control board contains the various controls, the guitar input jack, the on/off switch and the status LEDs.
Two triangular wooden "ears" were mounted on the back of the box to act as supports for the solar panel. A solar panel mount with an adjustable angle can be fashioned if desired.
Feed a low-level 500 Hz sine-wave tone from a signal generator into the guitar input and monitor the preamp output on the Ch1 Mon test point using an oscilloscope. Adjust the bias control to achieve the highest gain and least distortion.
If you built the optional second input channel, perform the same alignment procedure on the second channel.
Feed the test tone into the reverb recovery amp's input and adjust the reverb recovery amp's bias control for the highest gain and least distortion. Since there is no input drive control on the reverb recovery amp, it may be necessary to attenuate the signal generator's sine wave output with a 10K or 100K potentiometer.
Set the amp in a location where the sun shines on the solar panel. For the fastest charging and longest playing time, the solar panel should be aimed directly at the sun. Plug an electric guitar into the preamp input. Play the guitar and adjust the input drive control to a level that is below where the clipping LED starts to blink. Adjust the tone controls and reverb return control for the desired tone. Play your guitar as long as the sun is shining, then play a little longer (about an hour) on battery power. Turn the amp off when you are done playing to preserve what's left of the battery's charge, then place the amp in a sunny location to recharge.
It is possible to produce both clean and distorted amplification by adjusting the input drive and master volume signals.

Back to FC's Music Circuits page.